Hopping Foot Height Measurement
Many Longarmers are curious if the Hopping Foot settings are correct on their longarms – this discussion will be focused on the Handi Quilter, Baby Lock, and Janome brands that use the KinetiQuilt Hopping Foot mechanism (other brands may use similar or different types). The KinetiQuilt system allows the hopping foot to move up and down with the needle, and most importantly dwell (stay still with downward pressure) on the quilt sandwich as the stitch is being formed. The settings are done at the factory and should be double-checked by the installer but are not likely to change unless some ugly event happens (running over scissors or a ruler, foot getting hung on an open seam, etc) that could jam or bend some of the components.
Measurements and Components:
If your machine is making great stitches, stitching equally well in open areas and through seams, and has no abnormal noises there is likely no issue with the settings on the hopping or presser foot. If you are concerned something may be out of spec, here are several things a consumer can check:
1: Height from Hopping Foot Jam Nut to Needle Plate – 1.5 inches
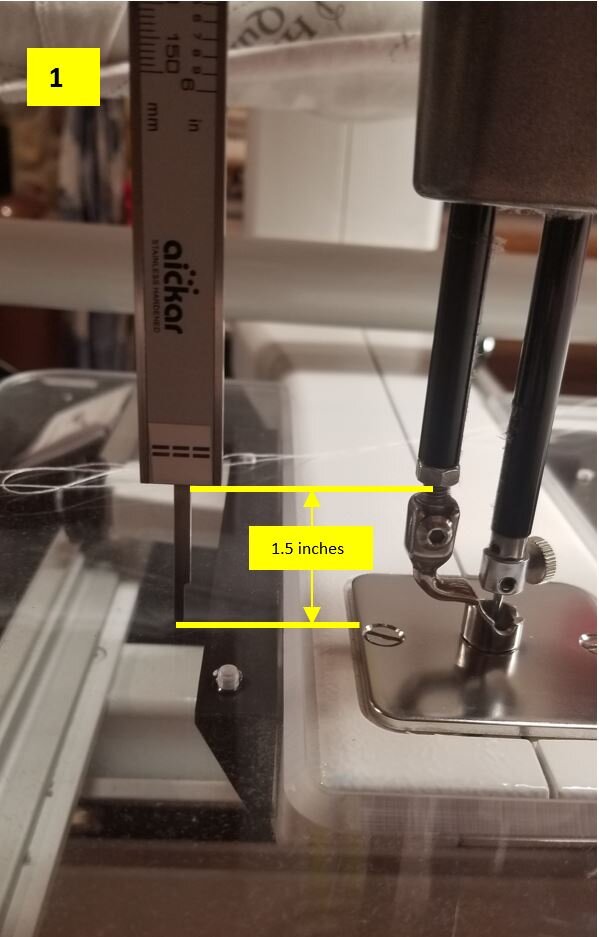
The initial height setting at the factory places the bottom of the jam nut holding the presser foot 1.5 inches above the needle plate when the needle is in it highest position. See Picture 1 – Picture 1a shows the measurement using a Vernier Caliper but a ruler or measuring tape will work as well.

2: 7-8 threads between Jam Nut and top of hopping foot
There should be 7-8 threads on the hopping foot shaft visible between the bottom of the Jam Nut and the top of the Hopping Foot attachment point. Too many or too few threads will affect the spring tension of the Hopping Foot mechanism. See Picture 2.

Key Point – Spring Tension – the spring tension system enables the hopping foot to adapt to different thickness of quilt sandwiches and to the variations of quilt thickness from seams, batting variations, and silk-screening on T-Shirt quilts. If the settings are near normal, the spring tension will take care of thickness deviations.
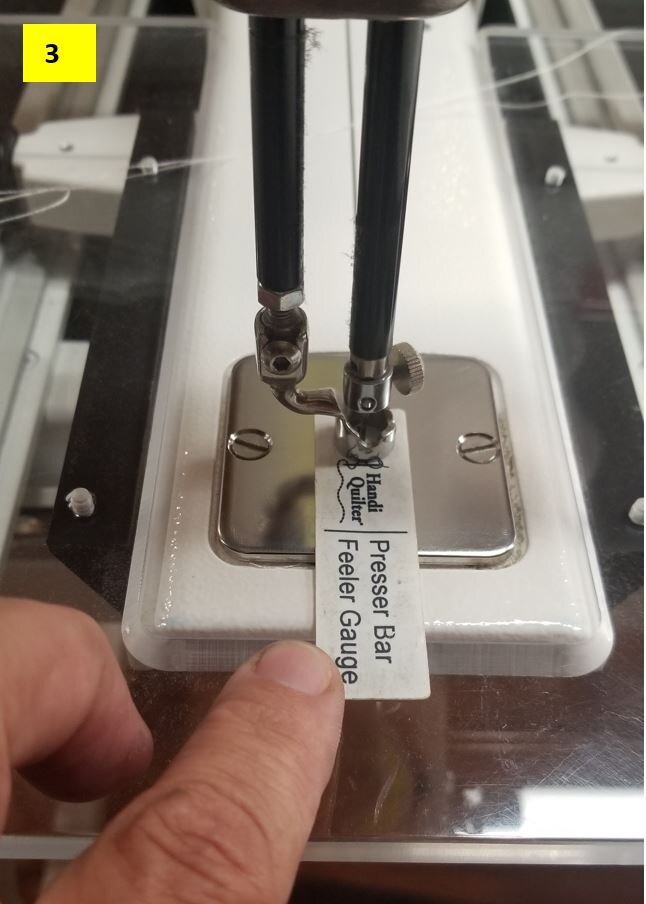
3: Gap between Hopping Foot and Needle Plate at bottom
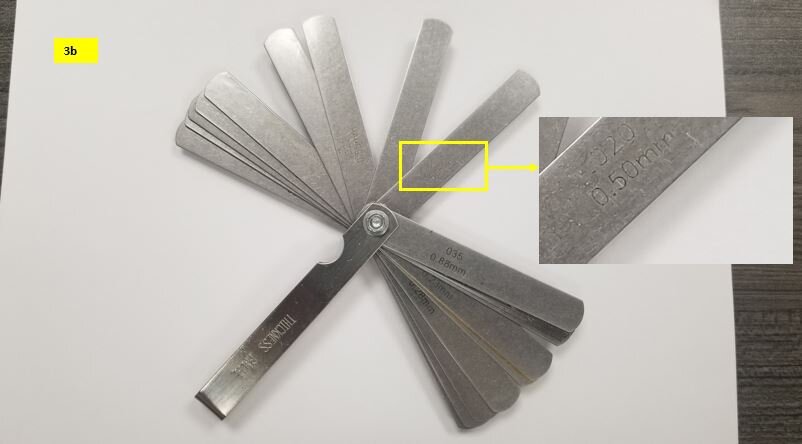
When the needle shaft is at its lowest point, the Hopping Foot base should be lightly touching the Needle Plate to no more than 0.5mm above the Needle Plate. Handi Quilter has a nifty gauge as seen in Pictures 3 and 3a 0.5mm thick with a slot for the needle to go in, but a Feeler Gauge set from a local hardware store costing $5 or so will work just fine – see Picture 3b – the 0.5mm gauge will need to be inserted against the needle on one side of the Hopping Foot.

If the Hopping Foot is too high (greater than 0.5mm above the Needle Plate when needle shaft is at its lowest point) or too low (more than light pressure on Needle Plate from Hopping Foot at lowest point) you will need to get a Tech out to adjust – in some cases the adjustment can be made externally through access ports but in others the machine casing may need to be opened. Again – if your machine is making quality stitches at various fabric thicknesses and is not making abnormal noises there is little likelihood the Hopping Foot mechanism is significantly out of spec.
Quilt on!
Do you have questions on this topic or a suggestion for another one you are interested in?